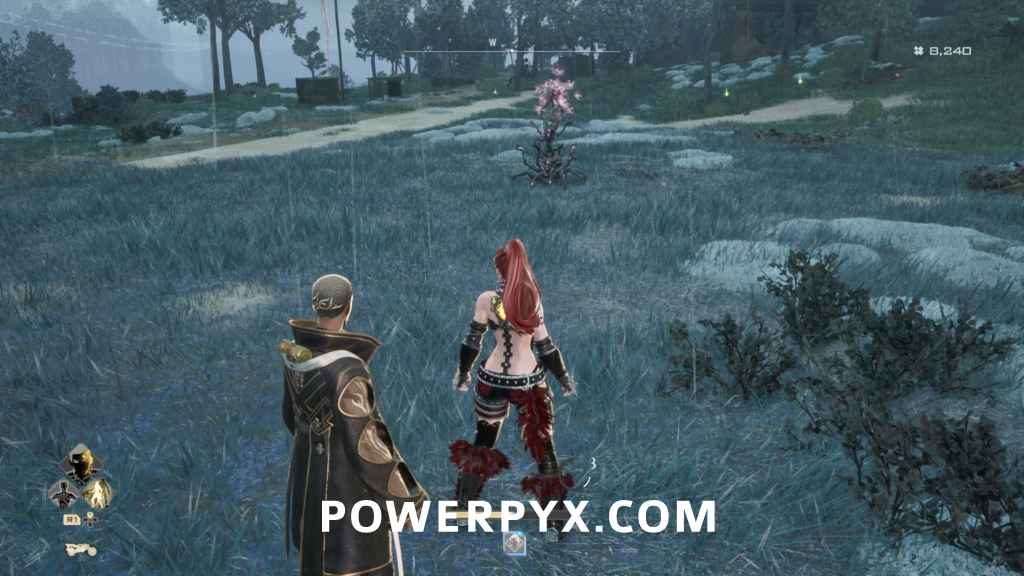
Code Vein 2 contains 63 Map Jammer locations. Map Jammers are purple trees you can find throughout the game. Destroying them will reveal the map in that area.
For the trophy/achievement Touring the Frontier you only need to destroy the Map Jammers in the Overworld that unlock the Overall Map (the Dungeon Map Jammers aren’t needed). The rough area of the Map Jammers location will be marked on your world map by red circles. You do not need to destroy any Map Jammers located inside of a dungeon for the trophy, but those will also be included here too for sake of completion.
MagMell
MagMell is the area that you start in, having you explore 2277: The Present, as well as 2177: Assault on MagMell Era. Most of the area cannot be explored until completing 2177: Assault on MagMell Era.
#1 – Overall Map
Unlocked by default.
#2 – Clifftop Cavern (Dungeon)
Will automatically come across it as part of the tutorial.


#3 – Water Treatment Planet (Dungeon)
Go through the hole in the wall in the giant room with all the broken pillars to drop down to the lower platform with the jammer on it.


#4 – Ruins (Dungeon)
Directly ahead of the entrance. You can either shoot it with the bow formae found in the nearby chest, or progress to the upper platform.


#5 – Cliff Underground Ruins (Dungeon)
Beside the elevator that leads to the boss room.


#6 – East Bay Underground Ruins (Dungeon)
On the edge of the cliff beside the ladder shortcut near the boss room.


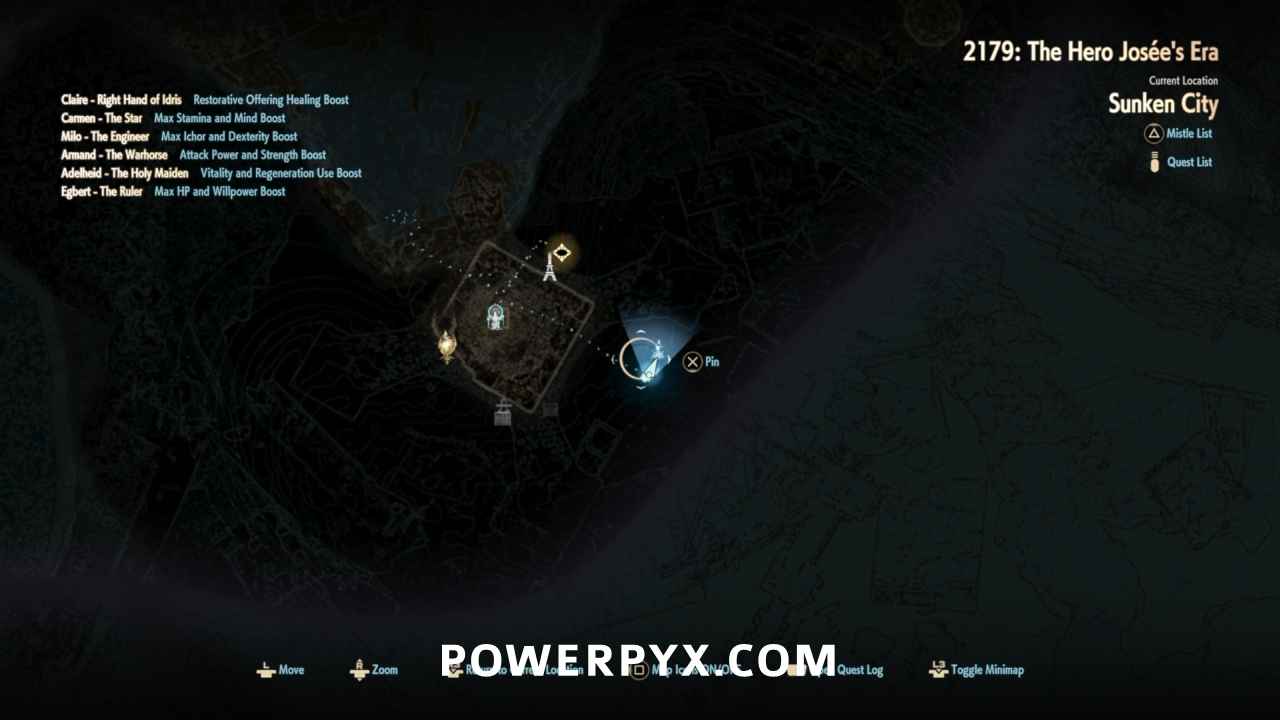
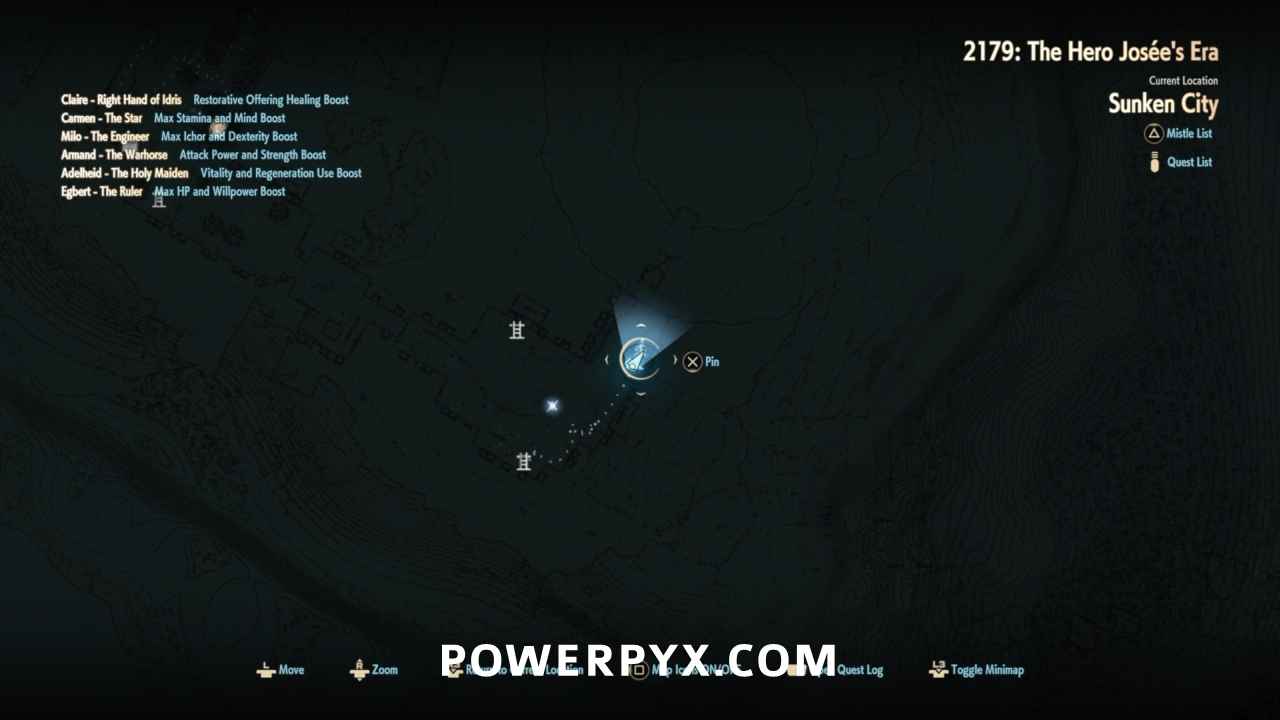
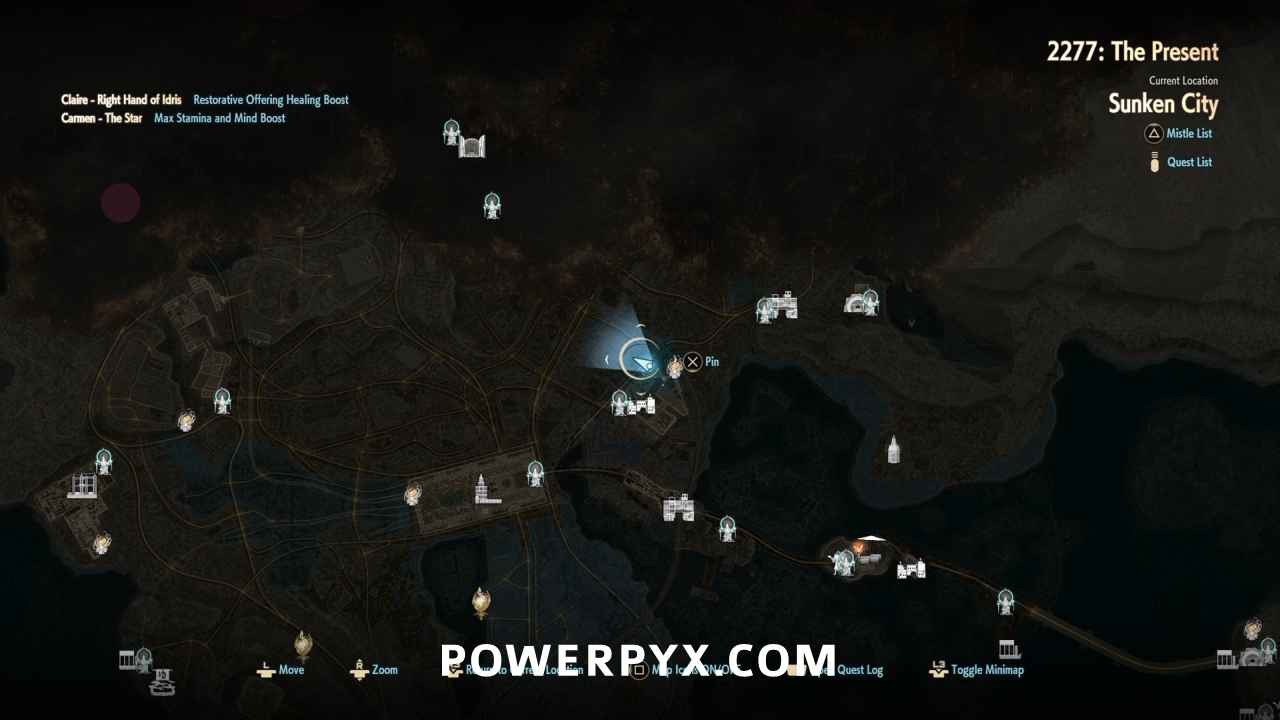
Sunken City
The Sunken City is the second area you’ll visit, where you’ll explore both 2277: The Present, as well as 2179: The Hero Josée’s Era. You’ll have access to the entire map right away, but some dungeons can only be accessed in 2179: The Hero Josée’s Era.
#7 – Overall Map Section 1
On the broken-down bridge, directly ahead as you enter the area from MagMell.


#8 – Overall Map Section 2
From Josée’s Outpost: Front Gate Mistle, go down the stairs to the right and start heading North-West. You’ll see the jammer by the road with an enemy praising a nearby statue.


#9 – Overall Map Section 3
From the Checkpoint Ruins Mistle, follow the road West and take the road on the right at the split. The map jammer will be up ahead on your right.


#10 – Overall Map Section 4
From West Coast Pier Mistle, go up the road on the West and then follow the road straight on which will start leading you to the south and you’ll eventually come across the jammer on the left.


#11 – Overall Map Section 5
From the Cliffside Ruins Mistle, follow the road on the left and keep following the road North-West. Once you see a small offroad section on your left, follow it and you’ll see the jammer in the middle of the woods.


#12 – Josée’s Outpost (Dungeon)
From Josée’s Outpost: West Gate Mistle, go on the left side of the station and start making your way across. You’ll see the jammer directly ahead.


#13 – Seized Substation (Dungeon)
After taking the first elevator, keep going forward into the lobby and the jammer is in the corner.


#14 – Sunken Pylon 1 (Dungeon)
Accessible during 2179: The Hero Josée’s Era.
Towards the end of the first section on the left walkway.


#15 – Sunken Pylon 2 (Dungeon)
Accessible during 2179: The Hero Josée’s Era.
In the large open room before the boss fight, go up the ladder on either the left or right side of the room. Follow the catwalk to the area that has the enemy shooting at you and the jammer is in a small hallway behind him.


#16 – Arcade Ruins (Dungeon)
Once you reach the outside area on the balcony’s, follow the left side and you’ll see the jammer inside a small cage on a platform.


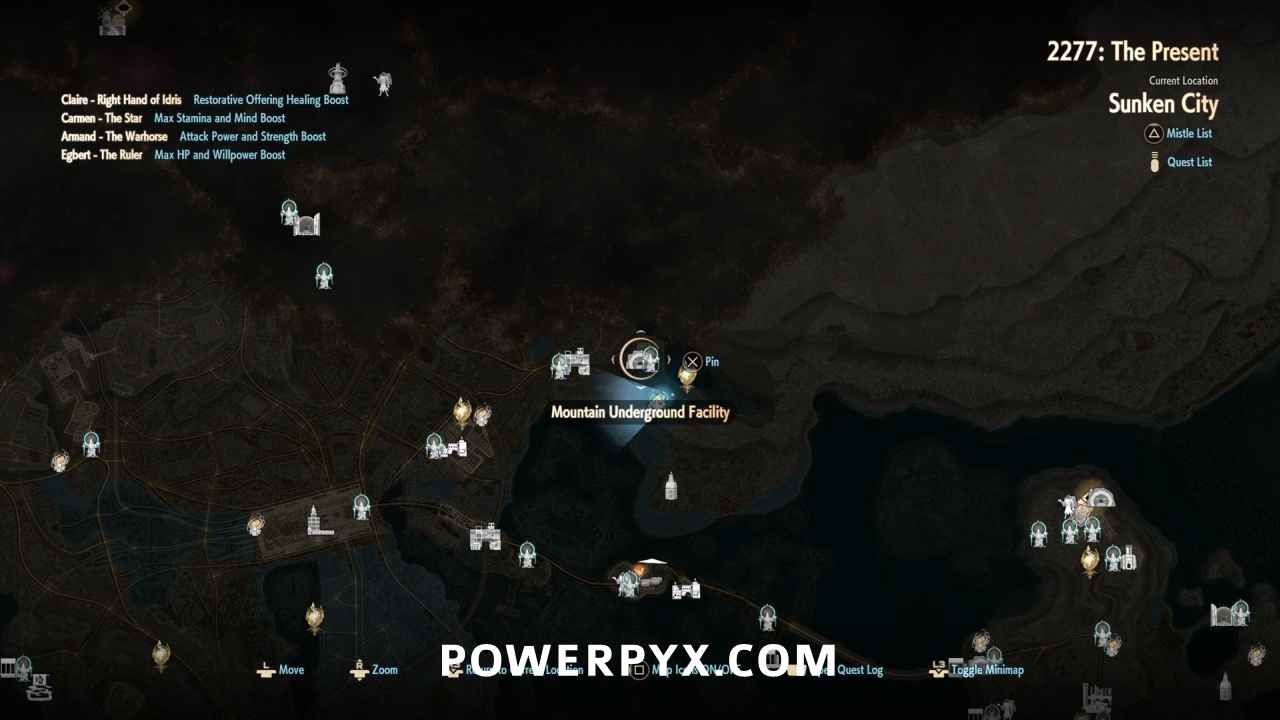
#17 – Mountain Underground Facility (Dungeon)
In the room directly next to the room with the Underground Storage Mistle.


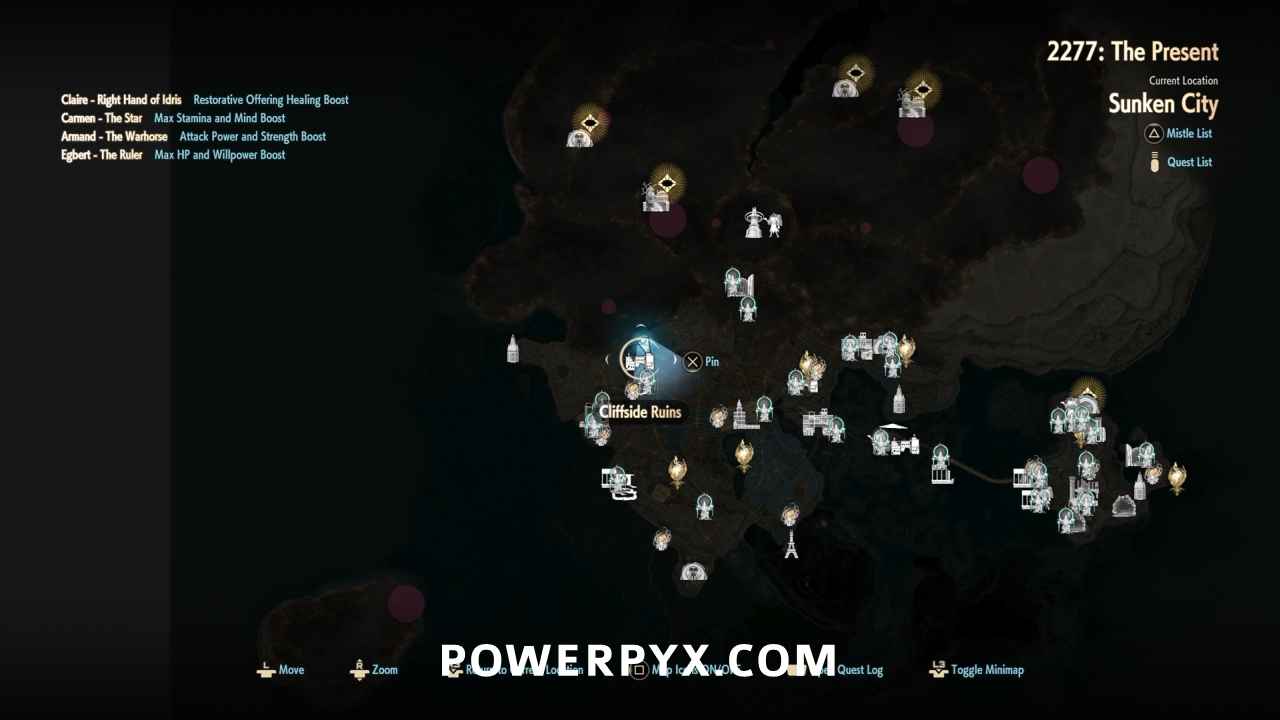
#18 – Cliffside Ruins (Dungeon)
At the end of the area, right by the exit ladder.


#19 – Western Gatehouse Ruins (Dungeon)
Accessible during 2179: The Hero Josée’s Era.
After defeating the Mutated Sentinel, go up the stairs and the jammer is at the top.


Corroded Scar
The Corroded Scar is the North-East section of the map accessed by following the road through the Checkpoint Ruins in the Sunken City. You’ll explore both 2277: The Present and 2178: The Hero Lyle’s Era. As soon as you enter the area, you’ll be forced to go straight to 2178: The Hero Lyle’s Era, where you’ll then be able to access the entire map. You can then explore the area in 2277: The Present as well as 2187: Free Exploration Era after reaching Forward Base Two during 2178: The Hero Lyle’s Era.
#20 – Supply Fort (Dungeon)
From the Supply Fort: Upper Level Mistle, follow the path until you reach the outside on the roof again. Go to the right and the jammer is in the corner.


#21 – Overall Map 1
In the Plateau Ruins. Head to the back center of the area and defeat the enemy with the map jammer.


#22 – Overall Map 2
From the Miners’ Abandoned Village Mistle, go out to the main road and follow it north across the giant bridge. You’ll eventually come across the jammer with some enemies.


#23 – Overall Map 3
From the Mine Elevator Entrance Mistle, go up the stairs, then follow the road up the mountain. Once you reach a split in the road, to left and you’ll eventually come across the jammer by a bulldozer. Alternatively, you can go from Forward Base Two, and go to the edge of the cliff to the West, then get on your Motorcycle and glide over to this section of the map, but it is riskier.


#24 – Overall Map 4
From the Abandoned Land Mistle, go down the hill to the north-east and there will be a fenced-off area with a group of enemies inside. You’ll need to defeat the enemy with the map jammer towards the back of the area.


#25 – Crystal Grotto/Limestone Cave (Dungeon)
From the Forward Base Two Mistle, you can take the South Bridge Elevator down and enter the cave on the right to enter the Crystal Grotto. Follow the cave until you reach the Military Camp in Spacious Cavern and the jammer is just past that area.


#26 – Abandoned Land (Dungeon)
Directly ahead of the entrance, by the broken-down van.


#27 – Pioneer Castle 1 (Dungeon)
Directly beside the West Wing Residential Block Mistle.


#28 – Pioneer Castle 2 (Dungeon)
From the Central Stairwell Mistle, go down the path on the right and follow it until you reach a large open area. The jammer is near the end on the left side, by the stairs.


#29 – Underground Shelter on Outskirts (Dungeon)
Directly beside the elevator.


#30 – Riverport Watch Fort (Dungeon)
After climbing down the first ladder that leads back to the center of the area, go through the door between the 2 ladders and enter the room on the right with the jammer.


#31 – North Watch Fort (Dungeon)
In the room before the ladder you can kick down to create a shortcut back to the Mistle.


#32 – Sealed Great Mine (Dungeon)
Accessible during 2182: The Hero Lyle’s Era 2.
Directly next to the Resurrection Monument.


Undead Forest
The Undead Forest is the North-West section of the map. To get there, you’ll need to go through the Collapsed Tunnel Dungeon in the Sunken City. You’ll explore both 2277: The Present and 2177: The Hero Holly’s Era. You’ll only be able to explore a small section of the map until you meet Lycoris. Once you do, you’ll be able to fully explore the map in 2277: The Present.
#33 – Collapsed Tunnel (Dungeon)
Follow the main path a short way from the Collapsed Tunnel Mistle, and you’ll see it directly ahead.


#34 – Overall Map 1
From the Pathway Entrance Mistle, go through the broken-down building to the main road, then look to your right. The jammer is at the edge of the cliff.


#35 – Overall Map 2
From the Pathway Entrance Mistle, go through the broken-down building to the main road, then follow the road leading east until you go down a broken bridge. Look down the hill to the right and you’ll see the jammer.


#36 – Plagued Village (Dungeon)
Near the edge of the village, by the broken-down church.


#37 – Gorge Cave (Dungeon)
From the Gorge Cave Mistle, keep following the path until you come across the second gated doorway. Open it and the jammer is on the other side.


#38 – Overall Map 3
From the Abandoned Farm Mistle, go down the road to the South-West and the jammer will be on your left.


#39 – Overall Map 4
From the Abandoned Farm Mistle, take the road North that goes up the hill. Keep following the road and you’ll see the jammer by some cargo crates directly ahead.


#40 – Overall Map 5
From the Bureau’s Castle Mistle. follow the road going South-East under the overpass. You’ll eventually see the jammer on your right in the woods.


#41 – Overall Map 6
From the Abandoned Hilltop Church Mistle, go up the hill to the South past the broken buildings and you’ll come across the jammer.


#42 – Ruined Town (Dungeon)
By the fountain near the West exit of the town.


#43 – Snowy Mountain Amusement Park (Dungeon)
From the Resurrection Monument, follow the main pathway until you get to the ferris wheel. Go down the stairs next to it and the jammer will be directly ahead.


#44 – Mountain Hamlet (Dungeon)
From the Mountain Hamlet Mistle, enter the area and then hug the left cliff wall and you’ll eventually come across the jammer by an enemy.


#45 – Forest Complex (Dungeon)
Directly ahead of the Resurrection Monument.


#46 – Abandoned Hilltop Church (Dungeon)
From the Resurrection Monument, go up the stairs that you have to activate using the levers. The jammer will be directly ahead.


#47 – Sanatorium 1 (Dungeon)
Accessible during 2277: The Present.
From the Sanatorium Mistle, go into the building and exit out the back door on the left side of the building. The jammer is on the ledge near the stairs leading to the fountain.


#48 – Sanatorium 2 (Dungeon)
Accessible during 2183: The Hero Holly’s Era 2.
After taking the elevator back up to the regular Sanatorium building from the underground facility, go around the hole you fell in and you’ll come across the jammer in front of the fountain.


#49 – Sanatorium 3 (Dungeon)
Accessible during 2183: The Hero Holly’s Era 2.
Once you’re in the Memory Realm section, the jammer will be directly before the wooden rope bridge towards the end of the area.


#50 – Riverside Church Ruins (Dungeon)
Directly before the Resurrection Monument at the end of the maze, the jammer will be on your right.


#51 – Grotto Military Site (Dungeon)
The jammer will be directly ahead of you after climbing the ladder that leads to the balcony.


#52 – Plagued Village: Underground Facility (Dungeon)
The jammer will be directly beside the ladder you need to go down to progress through the parkour section.


#53 – Frontier Observation Post (Dungeon)
Accessible during 2277: The Present.
The jammer is directly beside the ladder you have to kick down for the shortcut back to the Mistle.


Insula Carcere
This area can only be accessed after defeating Josée, Lyle, and Holly. This area is mostly just one big dungeon, with only a couple things out the outskirts. You’ll explore both 2277: The Present as well as 2197: The Hero Zenon’s Era here. You’ll also get access to 3 dungeons in each of the other regions except MagMell. Those dungeon map jammers will also be included here as you cannot access them unless you’re in 2197: The Hero Zenon’s Era.
#54 – Overall Map
Directly up the stairs ahead after getting off the ferry.


#55 – Insula Carcere 1 (Dungeon)
Directly next to the shortcut door leading back to Processing, after you exit the Cell block.


#56 – Insula Carcere 2 (Dungeon)
From the Upper Prison Area Mistle, go up the stairs on the right and the jammer will be by the door.


#57 – Hidden Lab in Sunken City (Dungeon)
After going up the stairs in the flooded section, the jammer will be directly next to you.


#58 – Hidden Lab in Corroded Scar (Dungeon)
Directly beside the Inner Lab in Corroded Scar Mistle.


#59 – Hidden Lab in Undead Forest (Dungeon)
After going across the second catwalk, the jammer will be beside the door leading to the Inner Lab in Undead Forest Mistle.


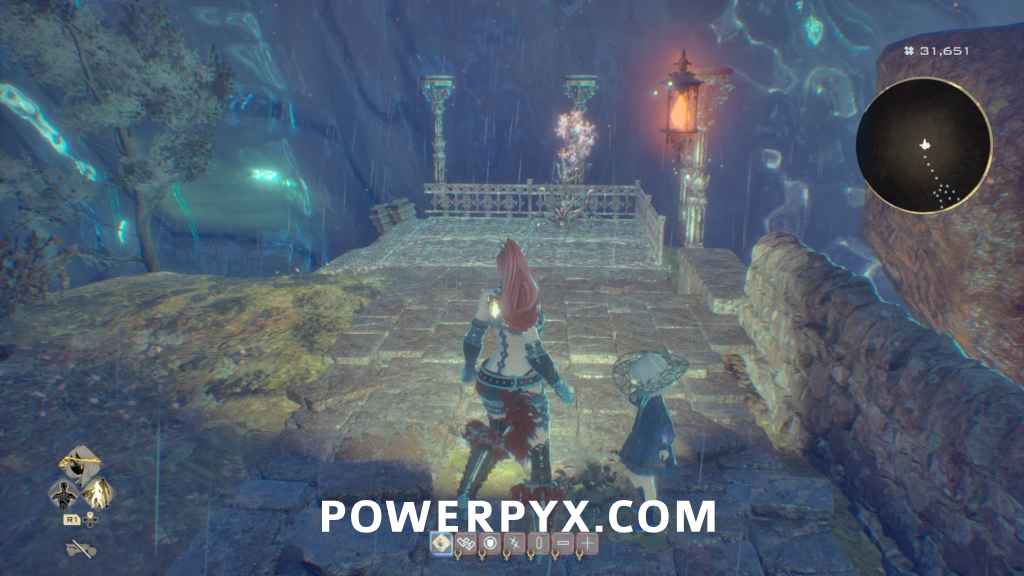
Sealing Ground
#60 – Luna Rapacis
Accessible During 2277: The Present.
After breaking the seal in the Luna Rapacis, the jammer will be directly ahead.


#61 – Sealing Spire 1
Accessible during 2207: Upheaval Era.
After going through the first door into the large room, the jammer will be in the center of the room.
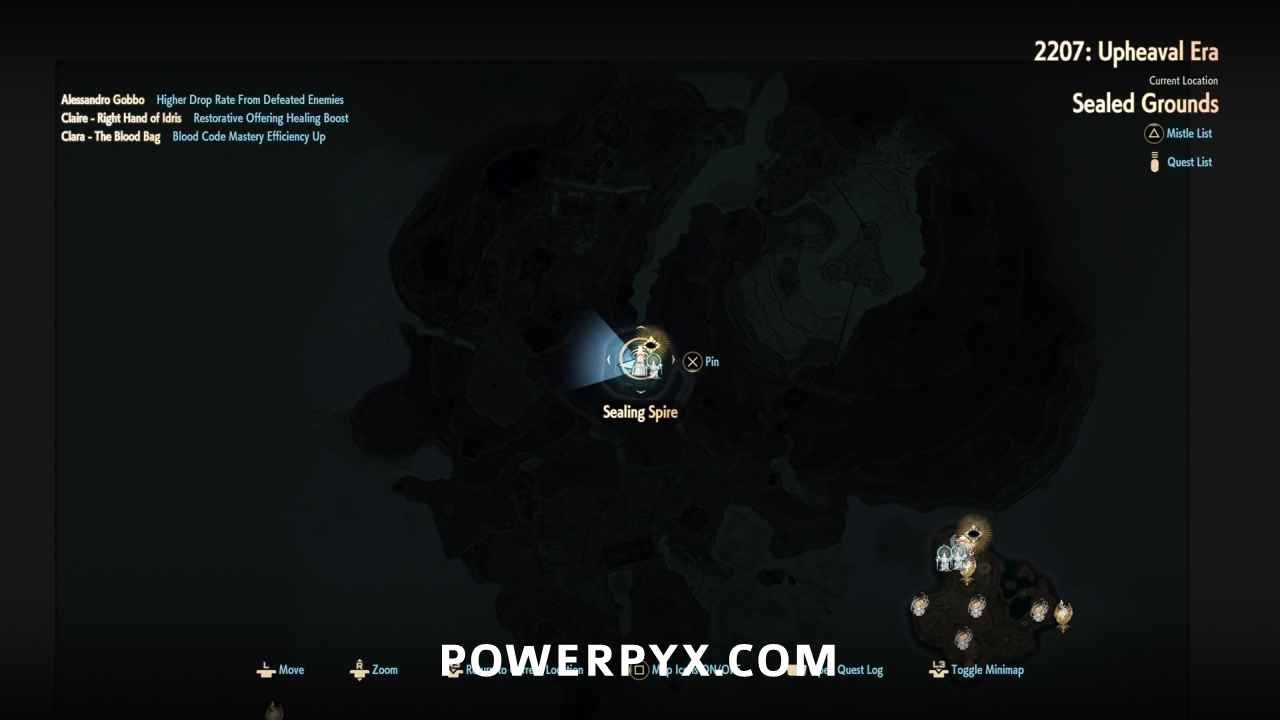


#62 – Sealing Spire 2
Accessible during 2207: Upheaval Era.
Once you’re in the second section of the middle floor, drop across the beams until you reach the stairs leading towards the enemy that gives you the key. To the right of those stairs, there will be a door where you can drop down to a platform with an elevator. Take the elevator up and the jammer will be on the platform below you.


#63 – Sealing Spire 3
Accessible during 2207: Upheaval Era.
From the ladder that you can kick down for a shortcut, enter the room next to the ladder and the map jammer will be behind the enemy.


More Code Vein 2 Guides: